Search This Blog

Thursday, 8 September 2022

September 2022 Update

 It has been a few months since the last update, the warm summer has meant that not much work has been carried out inside, However a few trains have been run:


Also the purchase of a Bachmann Rail Truck, this will become a winter battery conversion project, and as such I will document the progress on here:

And finally, work has continued on my OcCre Streetcar finishing and fitting the new bogies, please see that page for further details

Tuesday, 12 April 2022

April 2022 Update

 So, quite a lot has happened over the last couple of months,  The San Francisco Streetcar has progress to powering up and some initial test runs.  The warm weather allowed me time to get out and fix and wire in the the Kippo Signal Box.  Then there was the surprise event, which started with the purchase of an LGB Steeplecab, and the subsequent radio control battery conversion.

And then there is the ad hoc playing testing in the sun:


Monday, 28 February 2022

February 2022 Update

 Work has been progress on my OcCre San Francisco Streetcar and the blog on that will be updated accordingly.  I did find that I was missing one of the filigree corner pieces,  and decided that I would cast my own, and used this as an opportunity to have a little trial:

These are my results from my trial.  First the material used for moulds and castings, the numbers refer to each item in the photo, and my conclusion below the photo:

  1. This is the Blue Stuff mould.
  2. This is a 2 part silicon mould.
  3. One of the original white-metal items used as a pattern.
  4. A 2 part resin cast made using the silicon mould.
  5. Two 2 part resin casts cleaned up.
  6. Green Stuff cast using Blue Stuff mould.
  7. Milliput cast using Blue Stuff mould.
  8. 2 part resin cast using Blue Stuff mould.

The silicon mould [2] could be removed from the pattern after about 1 hour, however the instructions suggest waiting at least 24 hour before use to fully cure. As suspected it had a number of small air bubbles, however due to the fineness of the item being cast cleaning the excess from the cast was impractical though not clearly seen in the block [4], though some casts [5] from the silicon mould were acceptable. Both Green Stuff and Milliput cast were attempted from the silicon mould, but due to the flexibility of the mould I could not get a casting from either.
The Blue Stuff mould [1] was made, following the instructions, heating for 1 minute and ready for immediate moulding, the mould can be used as soon at it reaches room temperature. My first attempt was very poor, however due to it re-usability, a second attempt took place taking note of the reasons for the first failure, which was not using small enough pieces initially to form around the mould, also just before the mould was ready, I re-immersed it in hot water to complete the moulding.
Using the Blue Stuff mould I cast first with Green Stuff [6] and after rolling out thin it took to the mould, was de-moulded after about 3 hours, and took 24 hours to harden, though it still retains some minor flexibility.
Again, using the Blue Stuff mould I cast with the Milliput [7], applying it similarly as I did with Green Stuff, this was far more sticky to handle. De-moulded again after about 3 hours, still not fully hardened, with hardening taking well over 12 hours.
My last cast with the Blue Stuff mould was the 2-part resin [8] hard enough to de-mould in less than 1 hour, and hardened by 3 hours (this will depend on the resin you use).
Conclusion:
  • Silicon is normally a good mould agent with 2 part resin, though it takes time to cure, and develop air bubbles and though the mould can be reused a number of times, you cannot make a new mould with it, recommend that a release agent is used.
  • Blue Stuff, good for one off casts due to being reusable, quick from making the pattern to casting the mould, after a few uses it does start to deform.
  • 2 part resin, generally good, and will flow in to most areas, though can be very brittle, and fine items can snap.
  • Green Stuff needs to be worked in to the mould and not suited for silicon moulds of other flexible moulds, never fully hardens.
  • Milliput as above needs to be worked in to the mould and not suited for silicon moulds of other flexible moulds, but does harden, could be come brittle, though with a long working time most flash could be removed before fully hardened.
I think all of these have a place in moulding and casting, but you need to ensure the correct combination.

Tuesday, 4 January 2022

January 2022 Update

 First post of 2022, and the holiday season break has seen me busy.  I have completed my Timpdon 2 Compartment Coach and Generator Wagon, and my Kippo Signal Box to hide the "Temple Yard" turnout switches has been started and almost completed, details to follow.  My other big project is an OcCre San Francisco Streetcar, only just started, and currently trying to work out how to motorize it, again the blog will be updated as this progresses.

Monday, 18 October 2021

October 2021 Update

 A few tasks done this month:

  • The Bachmann 10-wheeler was upgraded to a 4S Li-Ion with a new Rx and ESC, details on the 10-Wheeler page
  • The Points (switches) had their power and control reviewed, more details further down the page.
  • A Bachmann Tram has had work started to convert it to battery power, a new page with details will follow.
  • A Timpdon 2 compartment coach has been started, again a new page will be created to provide details.
  • Finally a Pola "Garden Shed" is under construction updates and photos will follow.

Point Control

Power supply and control units within the garage
Junction box with outgoing power
Conduit from garage to railway
Junction box with connections to points
Photo 1

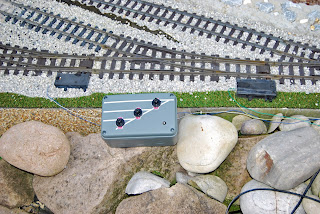
The point control to the "shed" area is slightly different. It was considered that any manoeuvring in that area would mean you would be closes by, so I decided to run 18 VDC to an IP66 control box, fitted with DPDT Centre off none latching switches to power the point motors. The unit has bee tested and works, however permanent installation will wait until I have constructed a building (Kippo Signal Box) to protect the junction box.

Thursday, 30 September 2021

September 2021 Update

It has been a while since I have updated my blog with the railway activity, so what has happened over the last few months.

  • The extension has had a reverse loop added  more details of that will in Extension "Phase 2" page.
  • The remote operation of the points (switches) motors has been transferred use with a Precision RC Train Engineer Revolution, affectionately know as a Revo, I will provide more details further down this page.
  • All track power has now been removed, along with isolation tracks and point motor supplementary switches. 
  • Wyvern Halt has new station signs mounted in a flower bed with "street" lights:


  • Planning is currently happening for a further extension, though sill in the very early stages, again see further down this page. 
  • To enable better operations, I now wish for the loco to "run around" the train in Wyvern Halt Station, and to enable this to happen the loco need to be uncoupled from the train.  As the train runs "double hooked" two uncoupling ramps are required.  Initially I tried with two "passive" ramps, however the loco/train would uncouple every time, so my next endeavour is to try one electrically operated (on order) and one passive ramp:


  • The railway has now gained its own cat:

Revolution 

When the railway was track powered this was remotely controlled by a Crest Train Engineer (TE), and via an auxiliary receiver,  when the track power was removed all the TE equipment went.

I looked around for various methods to control the points, but already having standard G Gauge point motors I was loath to move to a totally different system.  Luck would have it that I was offered a Precision RC Train Engineer Revolution (Revo) transmitter free, so all I would need would be the Revo "Track Switch Control Rx".  Fine Scale Brass were identified as the UK agent and a unit was ordered.

The unit comes as a bare unit with no casing as shown below, so a project box was obtained and the unit fitted inside.

Set up isn't difficult, however my lack of familiarity with the system did mean if took a couple of attempts to link (bind) the Tx and Rx, however once linked the system works so well a second Rx has now been ordered.

Wednesday, 21 April 2021

April 2021 Update

The weather has been kind and some work has progressed on the railway out side, mainly the final finishing touches to the stream. Some small pebbles bedded in to the bank and damp sand pressed in the damp cement. Obviously a train must be run, so a good photo opportunity

Work finishing the IP Engineering Railbus has been slow, all the electronics have arrived, but there are some issues, so completion of the motorisation is in abeyance. Final finish to the exterior is awaiting decal, they have been on order some weeks, and not arrived yet. It would seem there will be a flurry of work on this as everything is bound to arrive at the same time.